How I created an Ethereum Proof-of-Stake demo entirely with AI
Hi everybody!

Hi everybody!
This is a second post about my recently released project — ether-pos.
Please check it out before reading: https://tim-sha256.github.io/ether-pos/
And here’s the previous post on why I decided to create it: https://medium.com/@tim.sh/why-i-created-ethereum-proof-of-stake-demo-3e469ecfbe8e
Introduction
Ok, so I decided to create this project — but how do I do it?
A quick intro of myself:
I’ve never worked as a developer. I learned Python a couple years ago and been using it for prototyping and testing APIs, but I have never created any production-level apps.
Since early 2023 I’ve been coding with ChatGPT — and have been pretty happy with it. It’s perfect for small projects (ideally single files) and straightforward tasks — like writing an SQL query or a Python script.
But working on bigger projects with GPT made me feel miserable — I was always lost in the chaos of endless chats, often ending up making the project worse than it was before.
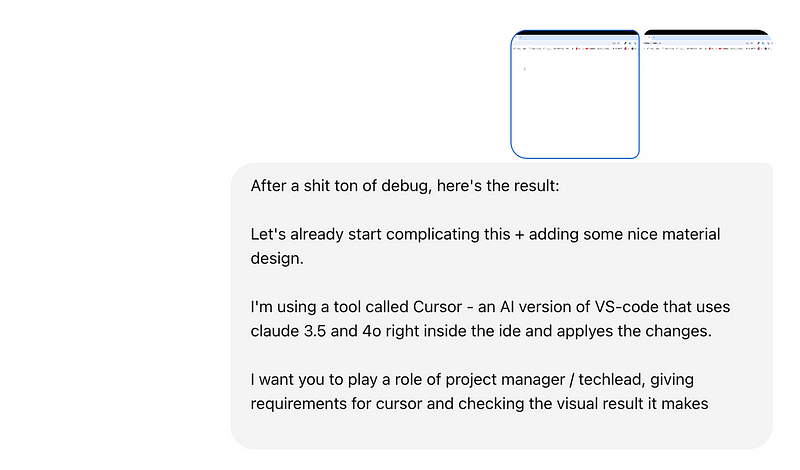
And then in July 2024 I discovered Cursor — an AI-powered version of VS Code that keeps your codebase in context and automatically applies changes to any file.
And it changed my workflow, as well as the level and quality of projects I made.
Below I describe how I created my latest project and which insights I got in the process — hope you find it useful.
Reasons to use two LLMs alongside each other
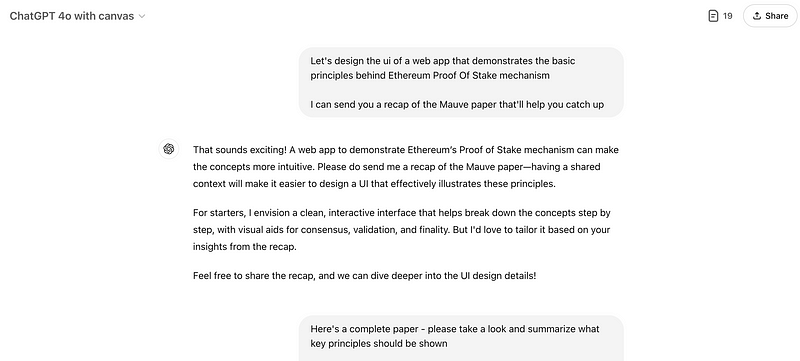
As I described in a previous post, I first started working on this project after a very long discussion with ChatGPT in an attempt to break down all technologies, algorithms, and ideas behind each section of the Mauve Paper.
After I was done with it, I wrote down a list of all important illustrations, examples and steps that helped me understand each particular part of Ethereum’s Proof of Stake.
Then I tried to formulate for myself the steps of building this project — at that time, I had no idea what it would look like and how it would work, I just wanted to build something to explain this whole thing in an interactive and intuitive way.
In my opinion, you really understand something theoretical only after you see a bunch of examples with real numbers, or even participate in the practical side of it.
That’s when I formulated a “problem” that I had, requiring some new approach to building with AI compared to my previous projects.
The Problem:
- I wanted to give the LLM acting as a coder clear and detailed instructions; otherwise, we’d mess things up pretty soon. I would end up mixing my thoughts on how to visualise something with actual instructions on what to do, or even questions about technologies in use — and drown in bugs and nonsense.
- At the same time, I didn’t have those instructions yet, and I’m not sure how to write them.
All I had in mind was:
- my understanding of the contents of Mauve Paper
- that list of examples and keypoints
- a high-level vision of how the UX might look.
The solution I came up with, which I used up until deploying the finished project, was a setup with two LLMs helping each other.
ChatGPTs “project manager” role
I used ChatGPT 4o as a “project manager”, which would help me design the UI and write technical requirements for each part of the project. I chose ChatGPT simply because I like its chat interface — when you talk to a project manager, you don’t need it to actually write or implement the code.
Note: I prefer to keep all discussions of one project in a single chat. This way, you never lose track of what you asked, and ChatGPT has a chance to remember everything discussed.
Key aspects of a “project manager” role for LLM + practical advice
- It must understand (or pretend to) the topic that you’re working on — in our case, the Mauve Paper.
You understanding it yourself is a very important pre-requisite.
That was the first thing I sent it after the introduction — the whole text of the paper.
Later on, I re-sent it to the same chat more than 10 times while working on the project, when I felt that it’s losing the context of it in a ton of new messages.
The last thing you want is for the LLM to start making up the next section or formula from the source in the middle of the project — if you don’t catch it at the right moment, you will end up with a project based on bullshit.
- It must have all your vision and be focused on the “business” side of things — your goals, your DoD (definition of done), etc.
It’s helpful in this context to ask it to summarise the whole project, with all sections and steps (I ended up with around 20 of them) once in a while, and correct him if he starts forgetting the bigger image. - Together with you, it must choose the overall stack that will be used in the project, and define an initial project structure.
Note that the stack chosen should be well-known and familiar to both GPT and cursor — for this reason, we agreed on React with MUI UI Kit.
But with the project structure, I just started with a single-file “MVP” option in the beginning of the project, and later on kinda allowed Cursor to choose any option it likes — some sections were described in single files, while others consisted of separate files for each step (component).
This was one of the things I didn’t focus enough on at the starting point, and I regretted it a lot (cost me 10+ hours of pedantic refactoring).
- It must be aware of other parties working on the project and the results they deliver — in this particular example, you need to tell it about Cursor, its role (the coder), and GPT’s role.
Also, it’s helpful to remind GPT that you don’t want it to write code for Cursor — instead, it needs to focus on the technical requirements and let Cursor do its job.
- After each instruction you should send it the result (in my case, the changes in UI), with questions like:
“How do you like Cursor’s work? Suggest any improvements for cursor in a new instruction”.
This is a way to let ChatGPT know about the progress in your project from the project manager’s perspective — it doesn’t know and doesn’t give a f about the code, it only sees what you and the end users see.
- A very important thing that I picked up a few hours after starting the development process: ChatGPT loves to return your uncertainty back to you.
For example, you might ask it:
“Ask cursor to use some js module to create a bar chart with the data”.
What GPT will typically do is place this uncertainty of yours (which module to use) into the instruction, like in the example below.
So you always need to remind it that it’s its job to do research on libraries that could be used and, most importantly, choose one option to include in the instruction for Cursor.


Conclusion of This Section
In our setup, treat GPT as a real project manager. It should:
- Know what’s going on.
- Understand what we’re describing to the end-user.
- Provide detailed, certain instructions.
Tip: Always read GPT’s suggestions carefully. If unsure, re-send source information.
Don’t accept instructions lacking certainty and details — Cursor will thank you later.
CaaC (Cursor as a Coder)
As mentioned, my goal was to keep Cursor in the realm of certainty by providing it with finished instructions and technical requirements.
Since August 2024, Cursor has a wonderful mode called “Composer” that allows it to auto-apply changes to a bunch of files.
I didn’t use the chat in the right sidebar — it is useless compared to the Composer.
Working in Composer has its nuances — below I tried to break down the workflow and problems I’d faced.
Key aspects of a “coder” role for Cursor + practical advice:
- Since I’ve separated roles between these two, Cursor lacks the understanding of the Mauve paper or the high-level plan of the project (though it eventually picked it up).
So be ready for nonsense produced by Cursor — sometimes he can make mistakes even though the instructions were clear and correct, but in most cases, nonsense in code = bad instructions.
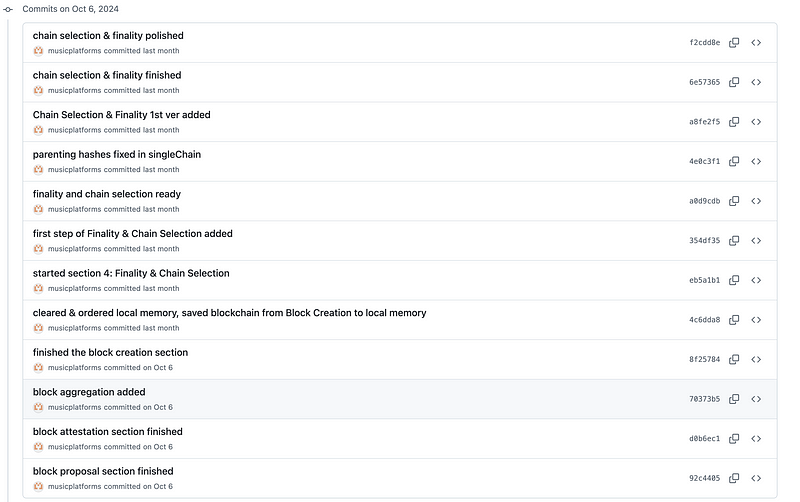
If you find such case, don’t keep it to yourself — head back to ChatGPT and make it feel guilty :) - ALWAYS COMMIT EVERYTHING.
Even the slightest changes — I made 100+ commits along the way, that’s almost 15 per section — and it was a wise decision.
Since you’re working in Composer, you don’t really keep track of all the edits Cursor makes, — which can sometimes include deletion of an entire logic or component for no reason.
Tip: Use cmd (or ctrl) + K in the Cursor terminal to turn your natural language request into a bash command.
I found it super helpful especially when working with Git — after 4+ years of using it, I still don’t remember anything beyond basic commands.

- Debug with Cursor, design with ChatGPT.
After you send an instruction from ChatGPT to Cursor, you’ll get some result. Oftentimes, you won’t like it from the first attempt.
Personally, I divided problems into two categories:
1. Code problems. That’s when you have an error displayed, or some value is not what it was supposed to be, etc.
In this case, I would debug it in Composer with Cursor, and usually it would solve the issue. This way you save a ton of time because of not doing copy-pasting for 10 times in a row.
2. Design problems. I mean design in general way— it includes UI/UX improvements, logic issues and stuff like that.
For these, I always pack them in a big message and send it to GPT, asking it to write an instruction for Cursor on fixing the issues and suggesting improvements.
I do it this way since GPT is in the context of your project and kinda understands your design and UX approach. Cursor doesn’t. - “Unblock” Cursor with GPT.
Sometimes Cursor gets into an endless loop — you’re asking it to fix something for a 10th time in a row, but it still doesn’t.
In cases like this, I prefer to copy the entire file / couple of files that Cursor is working on and send it to a separate GPT chat (o-1 works great for this) with an instruction on what to fix.
An important note here once again is to ask GPT to specifically edit only the needed part and send you back the full code.
GPT just loves to skip your functions in the answer and mock them. - When Cursor and GPT are both stuck, delete and start over
This one is pretty logical, but in the moment you sometimes forget that Composer can write the code again and again effortlessly and fear that you’d lose something.
Well, don’t. If you already have an instruction written by ChatGPT, copy and paste it as a new message, then copy/paste the problematic code, and a short review of what didn’t work and how your combined effort still didn’t help.
Then ask GPT to write a corrected instruction, send it to Cursor and check the result, — surprisingly, sometimes there’s enough context for both GPT and Cursor, and you might actually like the very first version of the code that Cursor wrote. - Create local files with mockup copy of data storage, and update them on each step with Cursor.
Sadly, I came up with this only after spending 5 hours on sorting out the Local Storage usage in my project.
The thing is, Cursor only has access to the files you share to the Composer — like the codebase, or the .cursorrules mentioned above.
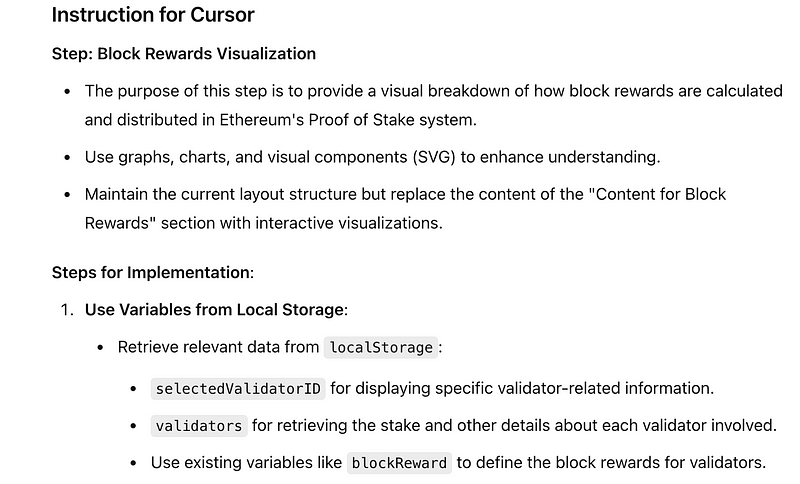
What it can’t access is any external data storage, including:
- databases (any kind)
- important in my React-only app case— local storage.
Since my project has a certain flow, where previous steps affect the next one, I needed to store the results (data) somewhere — the browser’s local storage.
The problem that I faced was that while Cursor wrote the code to read / write variables from the local storage, it didn’t always remember the data structure and exact variable names, spread around the codebase.
So when you ask Cursor to “get the value from “{variable_name}” in local storage, it often fails.
The solution I came up with (which I strongly recommend) was to create a localStorage.json file with the structure of the variables in local storage, update it any time Cursor adds a new line of code related to it, and include it in instructions for new features.
Tip: Include data types in your JSON to prevent type-related bugs.
I spent 1 hour trying to find a bug, which only happened because Cursor thought that the variable was stored as a string (and it was an int).
I also found that feeding ChatGPT the json was quite helpful — with this knowledge, GPT could reference the exact variable and field names in the instructions, making them even more detailed and concrete.

Finally, a couple of things I didn’t do in this project that I regret
- If your project is supposed to include texts that you’d like to edit later — think ahead!
In my case, the most important text was in the sidebar and in the introduction & conclusion sections.
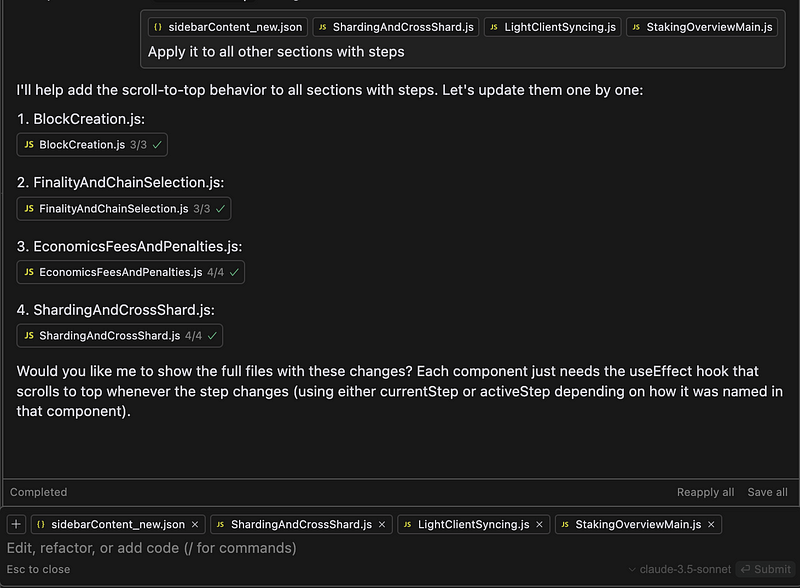
After completing the first section, I decided to store the text in .json format, to be able to edit it separately from the actual .js project files.
This “sidebarContent.json” seemed to be pretty nice — I told GPT about it, and with every new instruction, Cursor knew that it should import the sidebarContent and put the new sidebar text into it.
At some point, both GPT and Cursor forgot about this, so a few sections had hard-coded text in the .js files.
That’s the first important insight — always remind GPT about the way you store texts in the project when asking for a new instruction.
So I had to spend some time refining all of the sections to use the same sidebarContent_new.json for the sidebar contents.
Then another problem occurred — turns out, some of my text was in Markdown format (to include hyperlinks, formulas, etc.), and some of the sections were not configured correctly to handle the markdown.
This is another insight — think ahead of what you want to include in the text, choose the correct format (check out this video), and then tell GPT to always remind Cursor to import the necessary modules to handle markdown and formulas.
It took me almost a full day to rewrite the text, refactor all sections to handle it correctly, and make final edits. Don’t make the same mistake! - If your project has multiple pages with the same layout — ask Cursor to create a template!
That’s another thing I didn’t pay attention to in the beginning, and then I was punished for it multiple times.
My project is structured in a simple way — each section has steps, each step has a sidebar for text, some main content and “Back” / “Next” buttons.
When I created the first section, I thought that I could just reference its layout with in the instruction for every other section, and Cursor will just use the same template.
It turned out to be wrong. Cursor messed up everything it could — sidebar, proportions of elements, buttons and step progress bar.
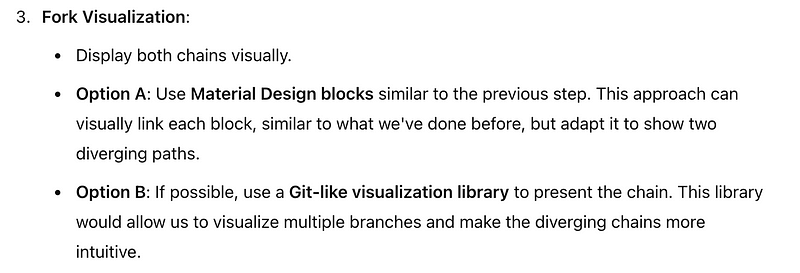
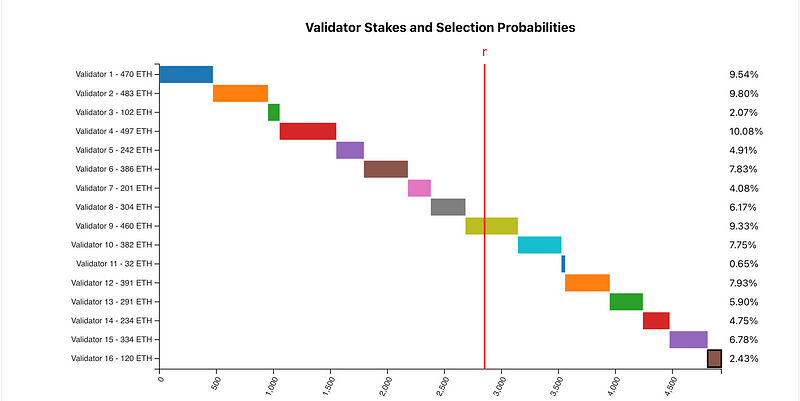
What I needed to do was to create an empty template with Cursor in the beginning, and then ask Cursor to copy it and edit the contents with every new section and step. - If you can, avoid advanced visualisations with external chart modules. And use SVG!
If you need to create a dynamic chart — make it simpler, if you want to draw something static, but more complex — use <svg> instead.
The reason for it is that both Cursor and GPT can’t clearly see how their changes in chart parameters affect the resulting image.
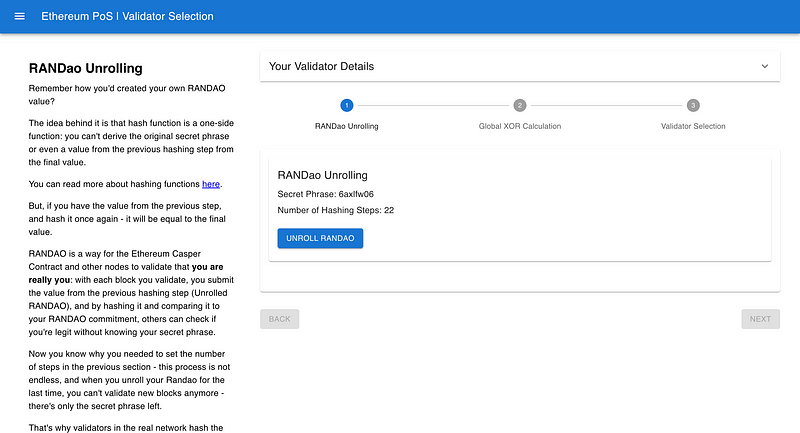
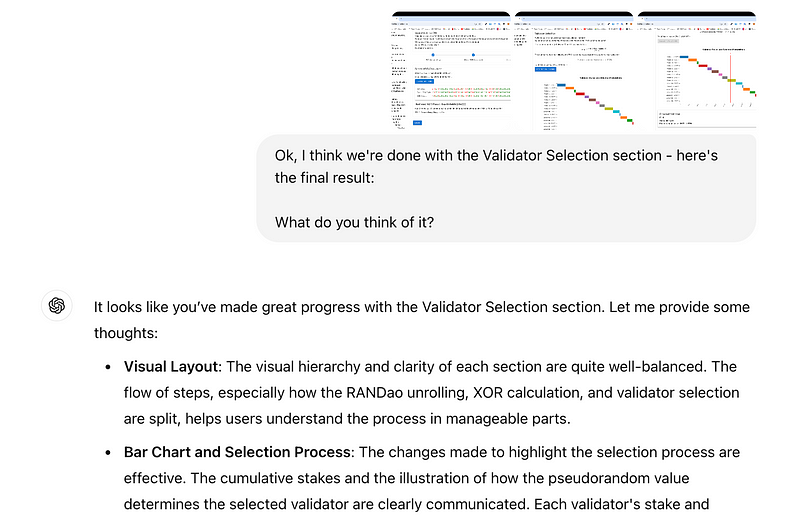
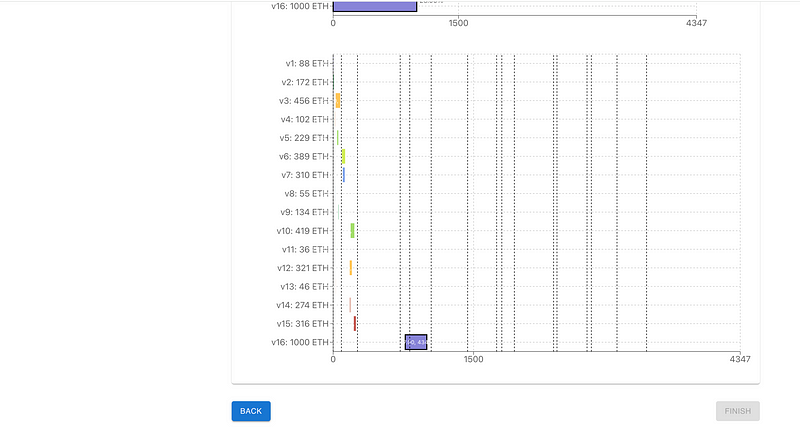
I had 10+ unsuccessful attempts with the bar chart on Validator Selection step — it was a nightmare.
But with SVG, both Cursor and GPT are capable of seeing how changes in the code affect the image.
Asking Cursor to create SVG turned out to be an easy task, which often required only 1 iteration! See the examples below.
Conclusion
Whatever “experts” say, you can’t build a serious project with AI in “2 prompts and 5 minutes,” especially not on the first attempt. It still requires a lot of work and attention.
However, the solution I chose — using two LLMs with different roles working on the same project — helped me keep the process clear and organised, ultimately delivering a solid web app.
The insights I’ve gained will definitely aid me in future projects. I plan to create a broader knowledge base compiling all my ideas, hints, and mistakes to share with you all — hope it helps you build your own app with AI!
Huge shoutout to my friend Vitalik Pavlenko and his repo — a React template for Cursor projects with detailed instructions. Check it out here: https://github.com/vpavlenko/web-2024-template.
I first learned about Cursor from Vitalik’s Telegram channel and then had a consultation with him (he’s a very generous person who likes to help others). He introduced me to Composer, and that’s how this all started.
Anyways, hope you found it interesting and/or helpful!
Let me know if you tried anything from this post in your own project and how it turned out, or if you have other tips not covered here: [email protected]